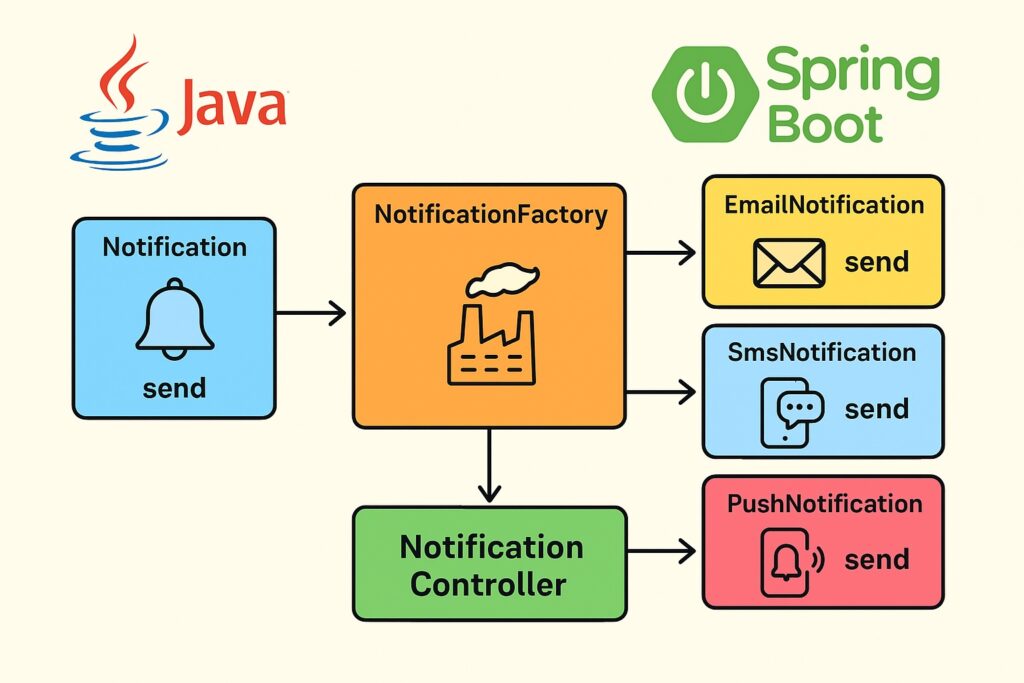
Let’s take the Factory Pattern and apply it to a Spring Boot web application. Let’s use a more real-world case: suppose you have a web app that sends notifications (e.g., Email, SMS, Push).
We’ll use a factory to decide which notification service to use at runtime, based on a request parameter.
Step 1: Define a common interface
public interface Notification {
    void send(String message);
}
Step 2: Implement concrete classes
import org.springframework.stereotype.Service;

@Service
public class EmailNotification implements Notification {
    @Override
    public void send(String message) {
        System.out.println("Sending Email: " + message);
    }
}

@Service
public class SmsNotification implements Notification {
    @Override
    public void send(String message) {
        System.out.println("Sending SMS: " + message);
    }
}

@Service
public class PushNotification implements Notification {
    @Override
    public void send(String message) {
        System.out.println("Sending Push Notification: " + message);
    }
}Step 3: Create the Factory
Instead of manually instantiating classes, we’ll let Spring manage the beans and inject them into a factory.
import org.springframework.stereotype.Component;

import java.util.Map;

@Component
public class NotificationFactory {

    private final Map<String, Notification> notificationMap;

    public NotificationFactory(Map<String, Notification> notificationMap) {
        this.notificationMap = notificationMap;
    }

    public Notification getNotification(String type) {
        Notification notification = notificationMap.get(type.toLowerCase());
        if (notification == null) {
            throw new IllegalArgumentException("Unknown notification type: " + type);
        }
        return notification;
    }
}Here, Spring automatically injects all Notification beans into the notificationMap (keyed by their bean name, like "emailNotification", "smsNotification", etc.).
Step 4: Use it in a REST Controller
import org.springframework.web.bind.annotation.*;

@RestController
@RequestMapping("/notify")
public class NotificationController {

    private final NotificationFactory notificationFactory;

    public NotificationController(NotificationFactory notificationFactory) {
        this.notificationFactory = notificationFactory;
    }

    @PostMapping("/{type}")
    public String sendNotification(@PathVariable String type, @RequestBody String message) {
        Notification notification = notificationFactory.getNotification(type);
        notification.send(message);
        return "Notification sent via " + type;
    }
}Step 5: Example Requests
Send an email notification
curl -X POST http://localhost:8080/notify/email -d "Hello via Email"
Output:
Sending Email: Hello via Email
Send an SMS notification
curl -X POST http://localhost:8080/notify/sms -d "Hello via SMS"
Output:
Sending SMS: Hello via SMS
Why this works well with Spring Boot
- Decouples client code (
NotificationController) from concrete classes. - Easy to add new notification types (just create a new implementation and Spring auto-wires it into the factory).
- Follows the Open/Closed Principle: system is open for extension but closed for modification.


